Which Push-Ups are Best for Chest?

A series of push-ups. Simply hearing the name conjures up images of arms that are toned and muscular, as well as a chest that is clearly defined. On the other hand, push-ups are an important exercise that provide a variety of benefits in addition to the fact that they are aesthetically pleasing. By utilizing them, you may improve your strength, core stability, and overall fitness without the need for any specialized equipment.
Which of your muscles are actually being worked when you perform those repetitions at full speed? Give no consideration to the focus that is placed on the chest. Performing push-ups, which are a multi-joint exercise, targets the powerhouses of your muscles. You will feel the burn most strongly in your pectorals, which are the chest muscles, your triceps, which are the back of your upper arms, and your anterior deltoids, which are your front shoulders. When you move, however, your abdominal muscles are equally as vital for maintaining the stability of your spine and keeping your body in a neutral position.
In this article, I will introduce you to the realm of push-ups and show you many varieties that will assist you in developing your chest to its utmost potential. During the time that you are working on building a chest that you will be proud of, I will demonstrate how to perform push-ups correctly, discuss the various progressions, and provide you with the skills that you need to conquer the push-up competition.
Standard Push-Up
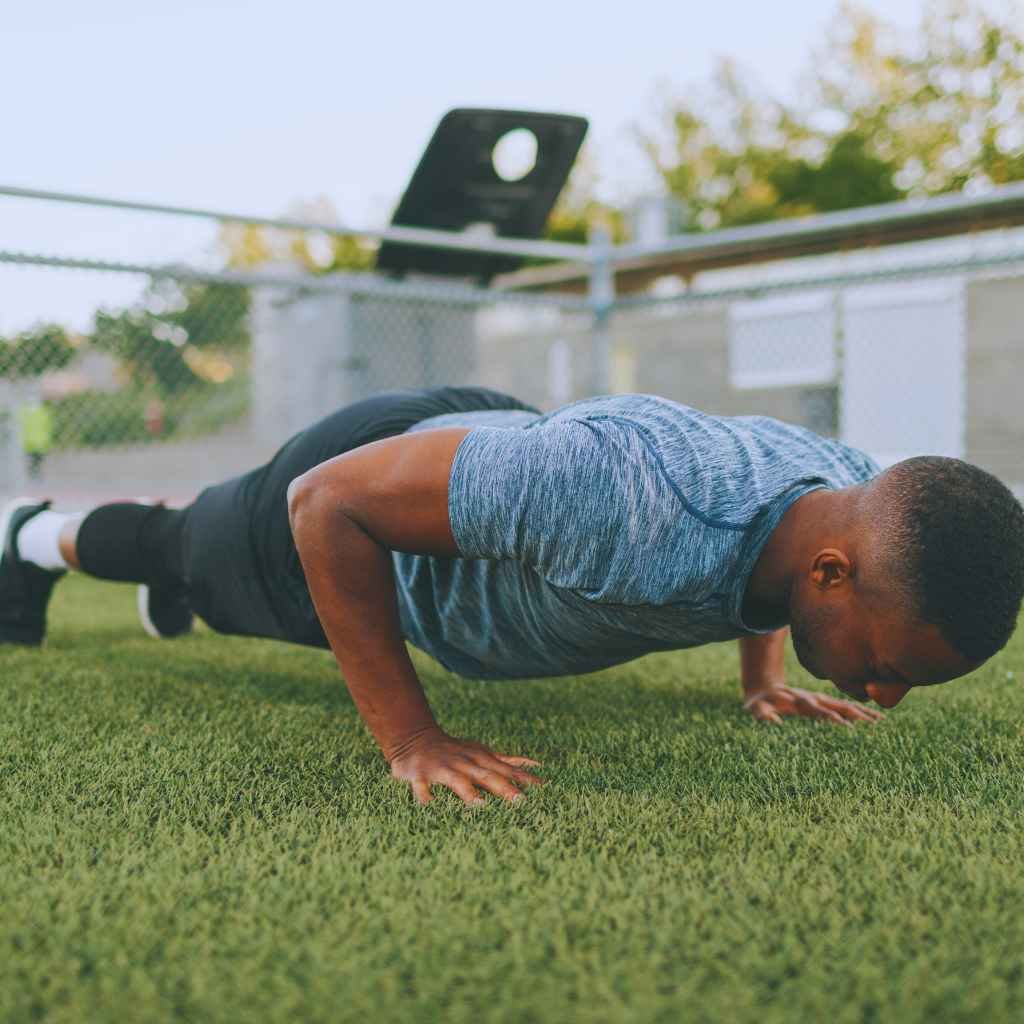
It is possible to strengthen the pectoralis major, which is the primary muscle in your chest, by practicing regular push-ups. This will allow you to attain a more defined chest. It does this by simultaneously engaging a large number of muscle groups, including the triceps (the muscles at the back of the arms) and the shoulders, which in turn strengthens your upper body as a whole. Performing push-ups, which are performed in a manner that is analogous to how you regularly push, can assist you in becoming more effective at performing routine tasks. It is possible that performing push-ups while maintaining a straight body will help you improve your posture and stability. In conclusion, it is an excellent workout for growing a powerful chest because it does not require any specialized equipment and can be performed in any location regardless of the location.
How to Perform?
- Arrange your hands shoulder-width apart and point your fingers forward to form a high plank position.
- Maintain an erect posture from head to toe. Pulling in your belly button toward your spine is a great way to engage your core.
- While bending at a 45-degree angle with your elbows, bring your chest down toward the floor.
- Resist the urge to let your elbows droop too far from your body and return to the beginning posture.
When you raise yourself up, exhale, and when you lower yourself, inhale.
Wide-Grip Push-Up
The stretch that is placed on your chest muscles is increased when you spread your fingers. This, in turn, causes the amount of work that is necessary to accomplish a push-up to rise. It is recommended that you perform wide-grip push-ups in order to get the most out of your pecs contraction. These push-ups allow you to lower your chest deeper. When you are in this wider position, it is more difficult to perform exercises that strengthen your shoulders, which are important for maintaining the stability of your body. You will need to engage your core more while you are using wide grips since this will help you maintain a straight line from your head to your toes, which will increase your stability.
How to Perform?
- Picture yourself in the ideal position for a push-up. Spread your fingers wider than your shoulders at this point. Your goal should be to find a steady and comfortable position that challenges you more than a regular push-up would. To further enhance comfort, fingers can be angled forward or slightly outward.
- Prepare yourself physically for an impending punch to the stomach by tensing your abdominal muscles. As a result, you can avoid strain on your lower back and a tense body throughout the motion.
- Picture yourself standing on a straight plank. Keep your neck and spine in a neutral position. Keep your hips from sagging or arching. Rigidity is key to getting the most out of this workout.
- Instead of bending them toward your sides, keep them bent toward your sides. Consider bringing your elbows close to your body slightly while you lower yourself. Bring your chin down to the level of the floor until it is almost touching.
- Pay attention to the feeling in your chest muscles as you lower yourself. This is the area that has to be worked on.
- When your chest is almost touching the floor, firmly press your palms into the ground. Pull yourself back up to the starting posture by engaging your chest muscles.
- Keep your body from swaying or bouncing. Perform the whole rep while keeping your power under control.
Decline Push-Up
The declining push-up is an advanced form of the conventional push-up that is used to strengthen the chest. By moving your weight to your upper body while your feet are raised, you may sculpt the lower half of your pectorals, which are the muscles that make up your chest, and get a more defined chest. Additionally, it puts your shoulders and triceps to the test, making it a complete upper-body workout.
How to Perform?
- With your palms facing down and your fingers spread wide, put your hands just beneath your shoulders. Get on all fours and move away from the bench. Put your weight squarely on the bench as you walk your feet back. Exercising on a higher surface is more challenging. If this is all new to you, I recommend starting on a lower platform.
- Pulling in your belly button toward your spine is a great way to activate your abdominal muscles. Doing so will keep you steady as you travel.
- Make sure your body is in a straight line from your crown to your toes. Do not slouch or arch your back. Preventing injuries requires maintaining a neutral spine position.
- Bend at the elbows and bring your chest down to the floor slowly. Throughout the action, make sure to keep your elbows tucked in tight to your body at a 45-degree angle.
- Drop until your torso is almost touching the ground. Your muscle engagement is maximized by this broad range of motion.
- Return to the beginning position by returning to an extended, non-locked arm position. Pay close attention to how your chest muscles propel the motion.
- Take a deep breath in as you lift yourself back up, then another deep breath in as you bring yourself back down. Throughout the activity, keep your breathing regular.
Diamond Push-Up
The diamond push-up is the opposite of a laser beam in terms of its ability to target the triceps. How come? Because by bringing your hands together, you are directing attention away from your chest and onto your triceps, which are the muscles on the back of your arms that make a horseshoe shape. You may improve your pushing strength and show off your arms by performing diamond push-ups, which are an excellent bodyweight workout that can help you develop stronger triceps. It is up to you to carry them out whenever and whenever you like.
How to Perform?
- Get yourself settled onto a supportive workout mat. Your hands and wrists will be protected by this.
- As you would for a regular push-up, get into a high plank position. At this point, clasp your hands together just beneath your breastbone. Make a diamond (or pyramid) formation with your thumbs and index fingers touching, making sure the backs of your hands are facing each other.
- Pulling in your belly button toward your spine is a great way to engage your core. Maintain an erect posture from head to toe. Make sure your wrists are precisely over your shoulders.
- Bending at the elbows, bring your chest down toward the floor. Picture yourself descending with your upper arms bent at a 45-degree angle to your body. Throughout the movement, maintain a straight back and a firm core.
- Bring your chest as low to the floor as you can while keeping your form correct. Your triceps (the rear of your upper arms) and inner chest muscles should feel a decent stretch.
- Holding your elbows close to your body is a key part of this movement. Keep them from flaring out to the sides; doing so can cause shoulder pain.
- As soon as you get to the bottom position, release your breath and straighten your elbows to return to the starting position of the plank. Retain a neutral spine position and engage your abdominal muscles.
- To accomplish a full push-up, make sure to fully extend your elbows at the top. Instead of locking your elbows, try to keep them as straight as you can.
Incline Push-Up
In contrast to the standard push-up, an angled push-up places more of an emphasis on the muscles that are located in the upper chest. Because the upward tilt places less strain on the wrists and shoulders, they are an excellent choice for individuals who are just starting out or who have issues with their joints. As a result of their ability to develop your upper body, they are a great prerequisite for frequent push-ups.
How to Perform?
- The typical height for an incline push-up is three feet, so set up your preferred incline surface accordingly.
- Hold yourself at arm’s length while facing the slope.
- With your fingers pointed either forward or slightly inward, stand with your hands shoulder-width apart.
- Keep your elbows loose but not locked and your arms straight.
- Maintain a neutral spine angle and a straight line connecting your head and heels to activate your abdominal muscles.
- With a gentle bend of the elbows and a descent of the chest towards the inclined surface, take a deep breath in.
- Make sure to maintain a straight line as you perform the action. Maintain a straight back and hips.
- Get down to a level where your chest is almost touching the floor.
- Return to the starting position by pressing up, exhaling. Pay close attention to how your chest muscles propel the motion. When you push, keep your elbows near your body. For a brief moment, clench your chest muscles and lock your arms at the top (but avoid hyperextending).
Archer Push-Up
The use of Archer push-ups will help you take your push-up routine to the next level. They have a significant impact on your upper body, sculpting your chest, shoulders, and triceps thanks to their tremendous impact. The use of only one arm for support results in an increase in core strength because of the necessity of doing so. There is the potential to fix any strength imbalances and achieve a more balanced development if equal attention is paid to both arms with equal intensity. When it comes to preparing for the more challenging single-arm push-up, Archer push-ups are an ideal choice for a warmup. The fact that it does not call for any specialized apparatus makes it an easy and approachable kind of physical activity.
How to Perform?
- Start by standing on a high plank. Spread your fingers wider than a person’s shoulder width apart, so they nearly touch their hips. For wrist comfort, point your fingers slightly outward.
- Squeeze your glutes and draw your belly button in toward your spine to activate your core.
- Keep your body in a straight line from your crown to your toes for a solid foundation.
- Pick a side and start moving. Bending your elbow on that arm, slowly bring your chest to that side. Maintain a perfectly straight arm that reaches for the ceiling.
- Picture yourself standing in a straight diagonal line from your head to your toes. Keep your core tight as you descend to ensure a controlled descent.
- Bring your chest down to a level with the floor, but don’t touch it entirely. Maintaining a perfect 90-degree angle with your working side elbow is the ideal position. Keep your arm straight and extended toward the ceiling.
- Raise yourself back up to the plank posture you started from by pushing yourself up with the working arm. Envision yourself shoving the earth away from you. Keeping your body in a straight line is essential for a successful push-up. Remember to maintain a tiny bend in your elbows as you reach the top, as this will help keep your joints healthy.
- When you’re back in the high plank, switch arms and drop yourself to the other side to repeat the motion.
- Strive for a steady, uninterrupted flow from side to side.
- Rather than focusing on speed, prioritize quality reps.
Plyometric Push-Ups
Plyometric push-ups are a dynamic twist on the standard push-up that are designed to develop explosiveness, power, and strength in the upper body. Not only do these workouts strengthen the abdominal muscles, arms, and shoulders, but they also improve cardiorespiratory fitness and burn fat. Although they are ideal for athletes who are wanting to improve their performance, beginners should approach with caution due to the strenuous nature of these exercises.
How to Perform?
- Maintain a perfect posture with your hands squarely beneath your shoulders and your body in a straight line from your head to your heels.
- Bring your chest close to the floor as you progressively lower your body.
- Raise your hands off the floor and stretch your arms fully as you push off the ground with maximum effort.
- Quickly clapping your hands together and then putting them back on the ground will increase the difficulty.
- Place your hands slightly behind your shoulders as you return to the plank position, preparing for the next exercise.
Utilizing the multi-purpose push-up, you have the opportunity to engage your chest muscles in a variety of different ways. Sculpting and strengthening your chest can be accomplished by modifying the difficulty level, the positioning of your hands, and the position of your body.
Always stay consistent. To avoid hitting a plateau and to give your muscles a fresh challenge, try incorporating a variety of push-ups into your program. Never let the amount of repetitions take precedence over correct form.
Everyone, from those who have never done exercise before to those who are seasoned professionals, can discover a push-up variation that is suitable for their requirements. Now is the time to start building that chest by getting down on your hands and knees!


